Disclosure: ClosetBlueprint is reader-supported. When you buy through links on our site, we may earn an affiliate commission at no extra cost to you. Learn more.
Accurate measurements are the difference between a closet system that fits perfectly and one that leaves awkward gaps (or does not fit at all). The good news: measuring a closet takes about 15 minutes with a tape measure, a pencil and a sheet of paper.

What you need
- A 25-foot tape measure
- Paper and pencil (or graph paper for a quick sketch)
- A stud finder (optional, but very useful for installation later)
- Your phone, to photograph the walls, outlets and obstacles
Step 1: Empty the closet and sketch the floor plan
Take everything out, including the old shelf and rod if you plan to replace them. Draw a simple top-down sketch: back wall, side walls and the door opening. Label every wall (A, B, C) so your notes stay organized.
Step 2: Measure the width of each wall
Measure each wall from corner to corner, at three heights: near the floor, at waist height and near the ceiling. Walls are rarely perfectly straight. Use the smallest of the three numbers so your system will fit.
Step 3: Measure the height
Measure from the floor to the ceiling in at least two places. If the closet has a sloped ceiling (common under stairs or in attic rooms), measure the lowest and highest points and note where the slope begins.
Step 4: Measure the depth
For a reach-in closet, measure from the back wall to the inside of the door frame. Standard hanging clothes need about 24 inches of depth. If your closet is shallower, you may need forward-facing hanging or shelves instead of rods.
Step 5: Measure the door opening and the returns
Reach-in closets usually have short sections of wall on each side of the door, called “returns”. Measure each return, the width and height of the door opening, and how far the door swings into the closet. Anything placed behind a return is hard to reach, which makes it the right spot for out-of-season items.
Step 6: Mark obstacles
Note the position (distance from the corner and from the floor) of:
- Light switches and outlets
- Light fixtures
- Windows, vents and access panels
- Baseboards and crown molding (measure their height and thickness)
- Attic hatches
Step 7: Find the studs
Most closet systems hang from a rail screwed into wall studs. Use a stud finder and mark the studs with painter’s tape. Studs are typically 16 inches apart on center in US homes.
Standard closet dimensions to keep in mind
| Element | Typical measurement |
|---|---|
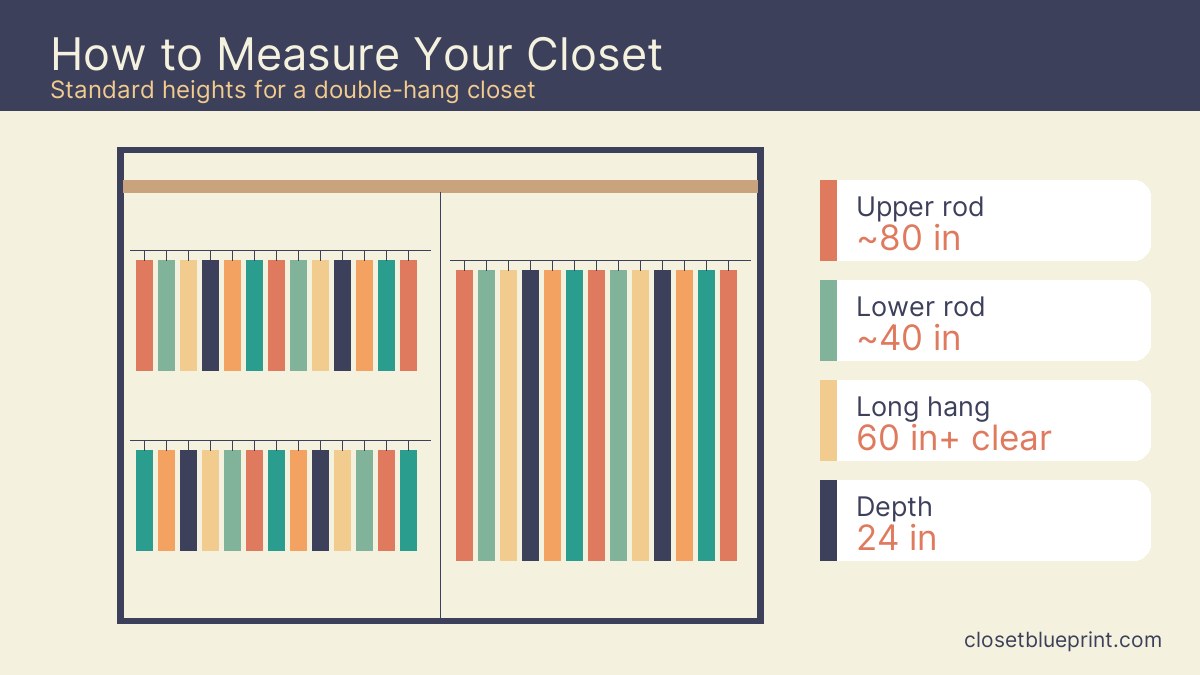
| Depth for hanging clothes | 24 in |
| Single rod height | about 66 in from the floor |
| Double hang: upper rod / lower rod | about 80 in / 40 in |
| Long hang (dresses, coats) | at least 60 in of clear space below the rod |
| Shelf depth for folded clothes | 12–16 in |
| Space between shelves for folded clothes | 10–12 in |
| Walk-in aisle width | at least 36 in |
Common measuring mistakes
- Measuring only once. Walls bow. Always take three readings and use the smallest.
- Forgetting the baseboard. A floor-based tower will not sit flush against the wall unless you account for it.
- Ignoring the door. A door that swings inward can block drawers.
- Rounding up. Round down to the nearest 1/8 inch.
🛒 Shop the essentials on Amazon
As an Amazon Associate I earn from qualifying purchases.
Next step: design your system
With your measurements in hand, you can use a manufacturer’s online designer to plan your layout and see the price. Not sure which system to choose? Start with our guide to the best closet systems.